By JAMIE KNOP
One of the hardest yet one of the most rewarding forms of photography has to be jewellery — or jewelry — photography. There are many factors that come into account when photographing jewellery and in this post we will go through them.
Before doing anything you have to get a brief laid out properly. If you don’t it’s like starting up a business with no business plan… that would not end too well, would it? OK so the brief will either come from yourselves if doing your own photography — or from your clients.

You want to get a clear outline of what the outcome of photography will be. We will take an example of a jewellery company wanting new images for their marketing campaign for Valentine’s Day. See below for an overview of a brief.
The Basics
- How many items of jewellery are to be photographed?
- Are they all single shots or are some group shots?
- Are there any specific requirements for size and resolution, e.g. does it have a layout to fit into?
In-Depth
- What style or theme of photography is to be used?
- Any specific requirements for backgrounds, props or lighting?
- If you ask yourself or your client these questions, we have a good brief to go from and will put us in good stead for the best results.
Lets take a look at the brief filled in:
The Basics
- How many items of jewellery are to be photographed? — Three.
- Are they all single shots or are some group shots? — All in one group shot.
- Are there any specific requirements for size and resolution, e.g. does it have a layout to fit into? — Shot to be square in shape, will send through layouts so you can match exactly.
In-Depth
- What style or theme of photography is to be used? — As this is a Valentine’s Day marketing campaign we want the jewellery photography to be themed around this using bold colors red/black.
- Any specific requirements for backgrounds, props or lighting? — To run with the theme it would be good to include roses in the image but still have the main focus on the jewellery it self.
Now with the brief we get a really good understanding of what we are going to do.
With the initial main factor looked at lets look at the photography side of things. We are dealing with small items here (the jewellery) so our setup must be prepared for it. It is advised to use a macro lens, as with a macro lens we can get in real close to the jewellery and pick up all the detail the naked eye wouldn’t see.
If you don’t have a macro lens you can always purchase extension tubes for your lens. These are cheap and allow to you get in closer to the jewellery with your normal lens.
Decent macro lenses like the Canon EF Macro 100mm F2.8 are prime lenses. This means they are at a fixed focal length. So how do you know which macro lens to use? It will depend on how far away you want to be from the subject, the level of magnification you want and how much you need the extra f numbers.
The focal length depends on how far away you want to be away from the subject. In a studio environment 100mm is a good distance as it gives you room to work with around the set.
The level of magnification depends on how much you want to magnify the image which will produce higher levels of detail in the image.
For true macro photography you want a lens that has a 1:1 magnification which will product real life size results like the Canon EF Macro 100mm F2.8.
Aperture is not of much of a concern in a studio as the we are using strobe lights to control the lighting. The only advantage would be more control over the depth of field, so if you wanted to blur the background in your image behind the jewellery you have the option to.
Always use a tripod, this not only helps with keeping your images sharp but it also helps you think about the composition properly and more technically.
When using a tripod be sure to turn off image stabilization on your lens if it has it. If you don’t your images may appear blurry. This is caused by the lens be trying to fix camera shake when there is none because we are using a tripod.
There is no need to buy a heavy studio tripod, a tripod that holds your camera still is fine. Things to look out for when buying a decent tripod are the weight, build quality and the head. You want a tripod that will last and will not move with the slightest touch, the Manfrotto 190XPROB tripod is an excellent tripod to get you started.
Onto the lighting, this depends on the mood you want to set in the image, but there are some main points to focus on here. One reason why jewellery photography can be complex to photograph is understanding lighting it properly.
As jewellery is often reflective you have to learn to control the reflections. It takes some playing around with, but some main points are using white reflectors and black to control highlights.
You want to keep the light as soft as possible. To do this you will want to be using soft boxes on your lights. As the word suggests these soften the harsh light that comes from your lights.
If we were to use direct heads or umbrellas we would run into all sorts of problems with bad reflections in the jewellery and blown highlights.
We recommend using Bowens light units as they are high quality and have been in the photography industry for years, in particular Bowens Gemini 1000 Watt lights, but for jewellery photography 500 watt would be sufficient.
Now here’s a top tip:
Use a mirror card to give your diamonds that extra sparkle. So bear that in mind if you want that extra wow factor in your images.
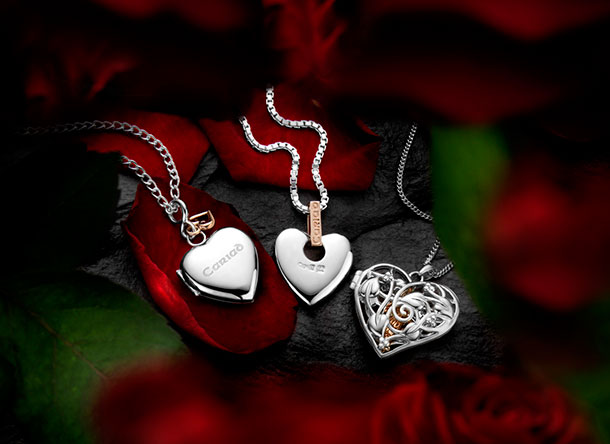
Once all this comes together with the brief, equipment and setup you will be producing results like the below.


