


Those tiny Raspberry Pi computer modules are great little devices, able to perform so many tasks. Since March 2013 the Raspberry Pi camera module is available, for $30 the piece… Or get the more fancy Rasperry Pi NoIR night vision module without IR filter for $38… Equipped with an imaging sensor, this hobbyist cameras can recognize faces, record time-lapse movies and do much more. The installation of this low cost mini lens is a straightforward process. Here’s how:
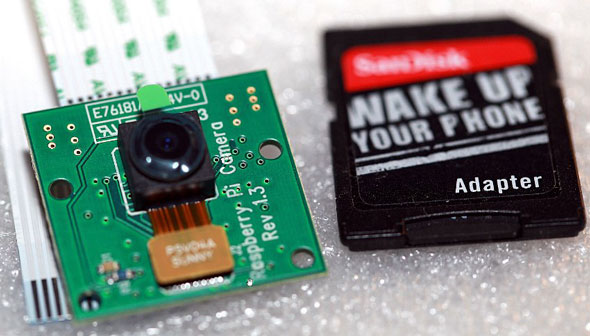
After unpacking, you wonder how small and light the photo and film module is. The size of the board corresponds to an SD card, the overall height including lens is not even a centimeter. The camera consists of a small (25mm x 20mm x 9mm) circuit board which connects to the Raspberry Pi’s Camera Serial Interface (CSI) bus connector via a flexible 15cm long ribbon cable.
The technical values of the photo imager are comparable to those of a cheap smartphone. It records 5MP still images and either 1080p or 720p videos as well as the older VGA format (640×480).
When you purchase the camera, you will receive a small camera board and cable. You’ll want to devise some method of supporting the camera in order to use it. Some Raspberry Pi camera mounts (and cases) are now available, check eBay for offers. You can also rig up something simple yourself if you wish.
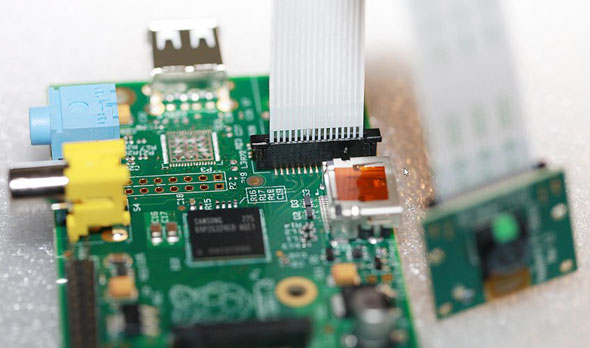
After plugging in the ribbon cable you need to install some software before you can operate the camera. If not done already, both the operating system and the computer’s firmware must be updated. Use following commands for the widely used Raspbian to refresh the software and make the camera operable:
sudo -s
apt-get update
apt-get upgrade -y
apt-get install git-core -y
wget https://raw.github.com/Hexxeh/rpi-update/master/rpi-update -O /usr/bin/rpi-update
chmod +x /usr/bin/rpi-update
rpi-update
Updating the operating system can take a while depending on the number of packages already installed and the available bandwidth. Finally, the firmware is updated to the latest level.
Once the software and firmware are up to speed and the necessary camera drivers installed you’ll reboot the system with following command:
sudo reboot
After this, check the version status with this command:
uname -a

In the next step you set up the camera with the proven configuration tool “raspi-config”.
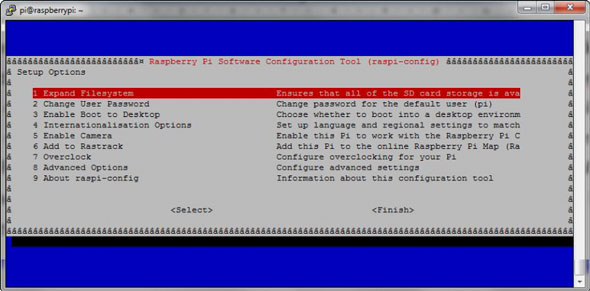
Now navigate with the arrow keys to the point “Enable Camera” and press “enter.” A dialog window pops up, once again you confirm “Enable.” Follow the same steps when you want to switch off the camera by selecting “Disable.”
Now it’s getting a bit more challenging. In the menu “Advanced Options” and submenu “Memory Split” you determine how much graphics memory you’ll make available for the GPU graphics processor. As a rule of thumb use half the amount of available RAM for the Raspberry Pi. Say you got a module with 256MB RAM, then assign the graphics chip to use 128MB.
You’re all set, installation of your brand new $30 camera is complete. raspi-config now wants to initiate a reboot, among other things to activate the memory allocation for the GPU. Confirm the restart by selecting OK. After the reboot, the camera can be used immediately.
Want to give it a try? Some nice Raspberry Pi camera offers with accessories you find on eBay.